Configuring FortiGate Intrusion Prevention via FortiManager
First step is to create the IPS Security Profile within Policy & Objects -> Object Configurations -> Security Profiles -> Intrusion Prevention. The policy created below is a copy of the default IPS profile. Let's go through each of the options.
There are no specific IPS Signatures enabled for this profile. Instead, an IPS filter is set for medium, high, and critical severity levels. These signatures and associated severity levels are published via FortiGuard. The Action is also set to Default which takes an action (block or pass) based on FortiGuard's recommendation. If the particular signature has a high probability for false positives, it may be set to pass, for example.
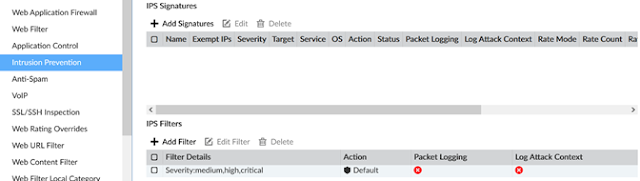 |
| FortiManager IPS Profile |
Be sure to keep an active FortiGuard subscription for IPS on your FortiGate! Without this subscription, the FortiGate will not have the latest IPS signatures and, with how fast cybersecurity threats evolve, will not be effective as an IPS solution. No reason to have the performance impact of IPS scanning with an old IPS signature database.
Once the IPS Security Profile is created, the next step is to apply the IPS profile to the relevant security policies. Navigate to Policy & Objects -> Policy Packages and edit a Policy Package. Within the Policy Package, edit the rules which you would like IPS applied to. Select the new profile created above as the IPS profile for those rules. Next follow the standard Installation Wizard on FortiManager to push these changes to the managed FortiGates.
-A

Comments
Post a Comment